
How We Built a Smart Sports Equipment Locker
Part 1: Manufacturing the Metal
This is the first post in a three-part series documenting how we designed, built, and deployed a smart sports equipment locker. Across the series we'll cover:
- Manufacturing the metal parts of the locker (this post)
- Integrating the electronics and software
- Installing the locker on site
Let's start at the beginning: the metal.
Knowing what to build before asking for a quote
Before we could ask metal manufacturers to quote the project, we first had to decide what kind of locker we wanted to build and what it would be used for.
That meant answering a few important questions. What is the locker for? More importantly, what kind of user experience do we want to provide? Should users unlock it with a mobile app, a web app, a PIN code, or something else? Will the locker be installed indoors or outdoors? What weather conditions will it need to handle? How many compartments should it have, and how big should they be? Will mains power be available, or should it run on batteries? What type of electronic locks should we use, and where will the electronics be installed?
Now let's go through the answers for our sports equipment locker.
General concept
The idea is simple: build a locker that lends out sports balls such as basketballs, footballs, and volleyballs.
Users unlock the locker with a mobile app. When they press the unlock button, the app sends a request to the backend platform, which then makes an API call to the locker to open the selected door.
Environment
The locker will be installed outdoors, so it has to handle the Latvian climate: cold winters, warm summers, and plenty of rain. That means it needs to be weatherproof.
For the cabinet, we chose galvanized steel with a painted finish to provide good protection against the weather.
Compartment size
The locker has three compartments for sports balls and one smaller service compartment for the electronics.
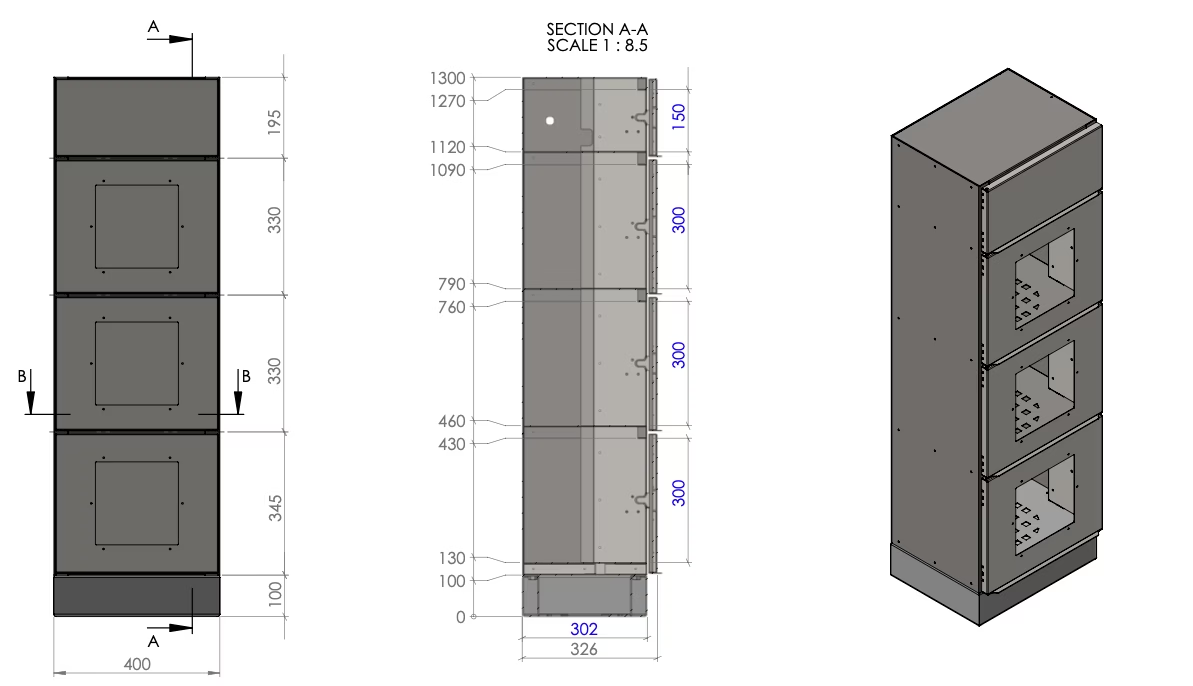
Each ball compartment is 33 cm wide, 30 cm high, and 30 cm deep. This is large enough to fit a standard size 7 basketball while still leaving enough space to easily reach in and take it out.
Above the ball compartments, we added a service compartment measuring 33 cm wide and 15 cm high. This houses the battery and the access control unit with its built-in LTE-M modem. The LTE-M antenna is mounted on the back of the locker.
Electronics
The locker runs on Allockate's Low Power Access solution over the LTE-M IoT mobile network and is powered entirely by a battery.
We chose a 12 V, 12 Ah battery, which should provide around four months of operation between charges.
For the door locks, we selected IP67-rated heavy-duty cabinet locks with electric motors. There are two common types of electronic locks: solenoid locks and motor-driven locks. Motor-driven locks use much less power, making them a much better choice for a battery-powered locker like ours.
From plan to drawings and a quote
With the general concept defined, we approached a metal manufacturer to prepare the first set of drawings and provide a quote.
The drawings took about two weeks to complete. We agreed on a price of €1,400 for the prototype, which included both the engineering drawings and the manufacturing of the first locker.
The good news is that metal fabrication scales well. Once the design is finished, the cost per locker drops significantly as production quantities increase.
Manufacturing
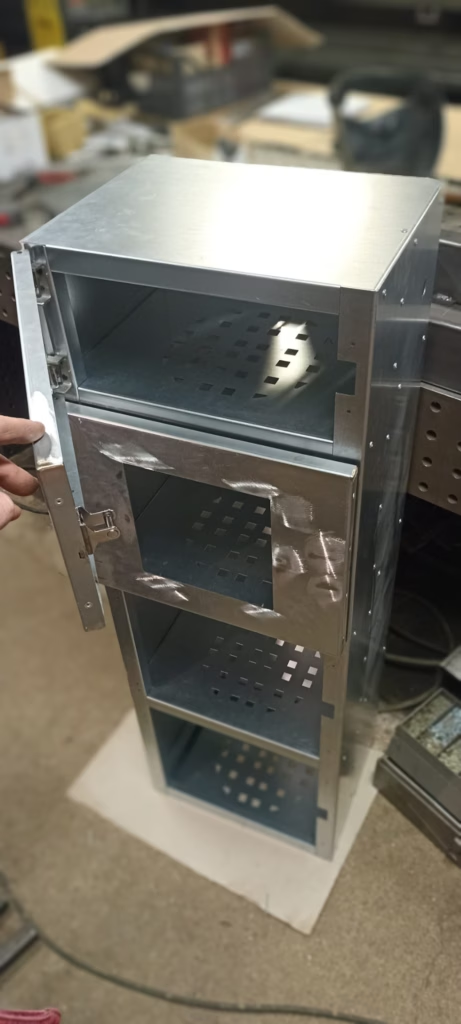
After reviewing and approving the drawings, we gave the go-ahead to start manufacturing. Building the prototype took another two weeks.
Here are a few photos showing the locker during production.
A manual opening mechanism
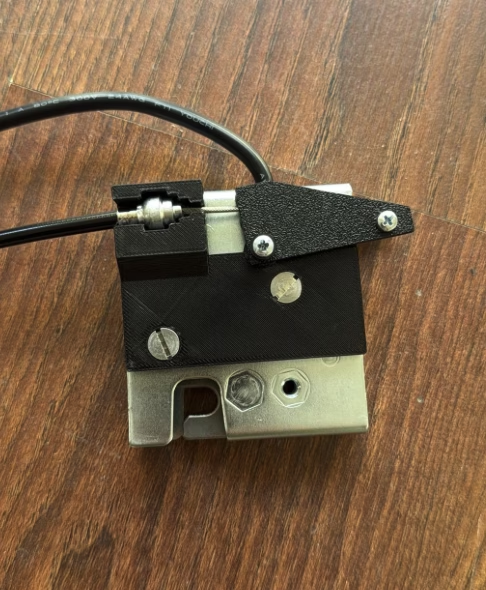
One feature we also wanted was a way to open the locker manually if needed. All of our electronic locks include a manual override, so we designed a simple mechanism that uses bicycle-style brake cables to release the doors.
Here's what our manual opening mechanism looks like.
Wrapping up
At this point, the metal locker was complete and ready for the next stage. The cabinet, compartments, manual opening mechanism, and all the mounting points for the electronics were in place. The prototype was ready to become a smart locker.
In Part 2, we'll install the electronics, fit the electronic locks, and connect everything to the Allockate platform to bring the locker to life.